Ultimate Guide to Waterproofing Window Wells

Egress windows are a critical safety measure in any basement living space, providing a vital escape route in emergencies. However, these windows can also be a common entry point for water, leading to potential damage or costly repairs.
Waterproofing your window wells is essential to protect your home and maintain the integrity of your egress windows. In this guide, we’ll walk you through the steps of how to waterproof an egress window well — plus what to do if these measures don’t hold up.
Step 1: Inspect and Clean the Area
Before we explore how to waterproof basement window wells, there are a few preliminary steps to address. This initial groundwork will lay the foundation for a successful waterproofing job.
Start with a Detailed Inspection
Begin by taking a close look at your egress window well. You’re playing the role of a detective here, searching for clues that indicate wear and tear or potential vulnerabilities. Check for any signs of rust on the window well itself, especially if it’s made of metal. Look for cracks in the foundation walls, as these can be entry points for water.
You’ll also want to inspect the window for any signs of damage or aging (such as broken seals or warping), which could compromise its integrity.
Clear Out Debris and Obstructions
Over time, it’s common for window wells to collect leaves, twigs, or other organic matter. This debris can not only obstruct your view but also impede proper drainage, leading to water accumulation and potential seepage into your basement.
Put on a pair of gloves to promptly remove all the debris from the well. If you have a window well cover, lift it off and set it aside so you can get a clear look at the condition of the well.
Clean Surfaces for Sealing
After the debris is cleared and potential issues have been identified, it’s time to clean the surfaces that need to be sealed. Any dirt or grime on the walls or edges of the window well can prevent sealants from adhering properly. Use a brush or a pressure washer to clean the surfaces thoroughly. Be sure to allow the area to dry completely before applying any waterproofing materials!
Step 2: Check for Proper Drainage

The next pivotal step in waterproofing window wells is to ensure that there’s a proper drainage system in place. Effective drainage is key to preventing water buildup, as well as any subsequent pressure that can lead to water damage in your basement.
The Role of Gravel in Drainage
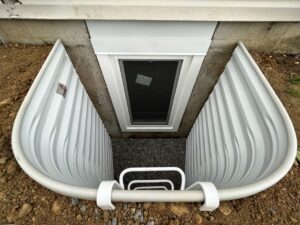
A well-designed egress window well should have a layer of gravel at the bottom. This gravel layer serves a dual purpose: it aids in the filtration of water and facilitates its flow towards the drainage point. The spaces between the gravel pieces create a porous medium that allows water to seep through quickly, rather than pooling at the base of the well.
Inspect the gravel layer to ensure it’s intact and free from dirt that could impede water flow. Over time, sediment can fill the gaps in the gravel, reducing its effectiveness. If necessary, remove any excess sediment and consider adding fresh gravel to maintain an adequate level for optimal drainage.
Addressing Water Pooling
If you notice water pooling in your egress window well, it’s a clear sign that the drainage is not functioning as it should. Standing water can be a breeding ground for insects, mold, and mildew, and it puts your basement at risk for water intrusion.
To rectify this issue, you may need to install a new drain or improve the existing one. The drain should ideally connect to your home’s weeping tile system or sump pump. This connection ensures that any water that enters the well is quickly redirected away from your home’s foundation, safeguarding against water damage.
Installing a Drainage System
If your egress window well lacks a drainage system or if the current system is inadequate, installing a new one might be necessary. This task typically involves digging to the base of the well, laying down a layer of gravel, and installing a pipe that channels water away from the well.
The complexity of this job can vary based on the specific conditions of your property in addition to the local climate, so it’s often best to consult with a professional installer in this case.
Step 3: Seal Cracks and Gaps
With a clean area and a functional drainage system, you’re now ready to tackle the next critical step in waterproofing your egress window well: sealing any existing cracks and gaps. This step works to create a watertight barrier that prevents moisture from penetrating the vulnerable areas around your window well and basement.
Identifying Problem Areas
Before you can seal, you need to identify where the potential entry points for water are. Carefully examine the window well walls and the window frame for any cracks, crevices, or gaps.
Note that even the smallest opening can be a conduit for water, especially during heavy rains or when snow melts. Pay particular attention to the areas where the window well attaches to the house, as these junctions are the most common sites for leaks.
Choosing Sealant for Egress Window Waterproofing
Selecting the appropriate sealant is crucial for effective waterproofing. You’ll want a high-quality waterproof sealant that is specifically designed for outdoor use. The product should be durable and capable of withstanding temperature fluctuations.
Look for flexible sealants during this step; they can accommodate the natural expansion and contraction that occurs with changing weather conditions.
Applying the Sealant
Once you have the right sealant, the application process can officially begin. Start by ensuring that the surfaces you’re about to seal are dry and free from dust or loose particles. Apply the sealant carefully into the cracks and gaps, filling them completely. For larger cracks, you may need to use a backer rod before applying the sealant to ensure a good fill and proper adhesion.
Smooth out the sealant with a caulking tool or a gloved finger to create a flush seal with the surface. Be sure to wipe away any excess sealant before it dries to maintain a clean, professional finish.
After sealing the cracks and gaps, it’s important to allow the sealant to cure fully. The curing time can vary depending on the product, so refer to the manufacturer’s instructions for the recommended drying time. During this period, avoid any contact with the sealant and protect it from water exposure to ensure it sets properly.
Step 4: Install a Window Well Cover

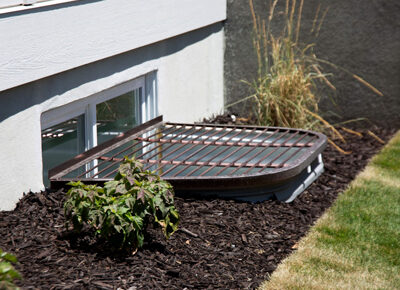
The next line of defense in waterproofing is to install a window well cover. This addition serves as a shield, protecting your well from various outdoor elements while still letting in natural light.
Benefits of a Window Well Cover
A window well cover is more than just a barrier against water; it also keeps out leaves, pests, and other debris that could clog your drainage system. During winter, it prevents snow from accumulating in the well, which can lead to water issues as it melts. A proper cover also doubles as a safety feature, preventing accidental falls for people and animals alike.
Choosing the Right Cover
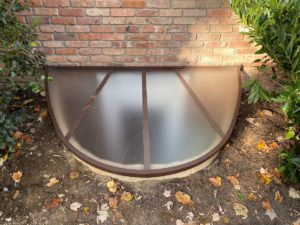
When waterproofing window wells, you’ll want to opt for a sturdy, high-quality cover that is designed to withstand the elements. Clear covers are a popular choice as they do not obstruct daylight from entering your basement. The material should be durable (i.e. polycarbonate or heavy-duty plastic) and capable of enduring heavy rain, snow, and a considerable amount of weight.
Secure Attachment
A window well cover must be securely attached to the well to be effective. Most covers come with hardware or fastening systems designed for this purpose. Follow the manufacturer’s instructions carefully to ensure that the cover is anchored properly; this will prevent it from being blown away by strong winds or being infiltrated by local wildlife.
Step 5: Apply a Waterproof Membrane
With the preventive measures in place for your egress window well, it’s time to consider an additional safeguard: the application of a waterproof membrane.
Understanding Waterproof Membranes
A waterproof membrane is a thin layer of water-tight material that is applied to the exterior surfaces of your egress window well. This membrane creates a continuous barrier that prevents water from penetrating the surface it covers. Typically made from rubberized asphalt, polyvinyl chloride (PVC), or thermoplastic olefin (TPO), these membranes are designed to be flexible and adhere tightly to the contours of your window well.
The Application Process
Applying a waterproof membrane is a task that requires precision and attention to detail. The surface must be clean and dry before you begin.
Start by applying a primer if recommended by the manufacturer, which will help the membrane adhere to the surface. Carefully measure the membrane, cutting it to fit the area around your egress window.
When applying the membrane, it’s important to ensure that there are no air bubbles or wrinkles, as these can compromise the effectiveness of the barrier. Use a roller or brush to smooth out the membrane to bond it firmly to the surface. Finally, overlap the edges of the different membrane pieces to create a strong, seamless barrier.
Professional Installation
While it is possible to DIY a waterproof membrane, the process can be a little complex. A poorly installed membrane might not only fail to protect your home but could also lead to further damage. For this reason, many homeowners opt to have a professional handle the installation.
Our team of egress professionals has both the experience and tools necessary to guarantee that the membrane is applied correctly, providing the maximum level of protection.
Step 6: Landscape Wisely

Thoughtful landscaping can significantly contribute to keeping water away from the foundation. Here’s how to best leverage these features as you complete the process of waterproofing your window wells.
Grading the Soil
The grade of the soil around your home is a critical factor in directing water away from your foundation. Ideally, the ground should slope away from your house, creating a natural pathway for water to flow. Check the grading around your egress window well; if the soil is flat or slopes toward your home, it’s time to regrade.
A slope of about 5% (which equates to a 6-inch rise over a 10-foot distance) is often recommended. This grading will make certain that rainwater and melting snow are directed away from your home, reducing the risk of it pooling around your window well.
Mulching and Erosion Control
Mulch can be a valuable ally in your landscaping strategy. It helps retain moisture in the soil during dry periods and prevents erosion during heavy rains. Apply mulch around your plants, but be careful not to pile it against the window well or foundation, as this can retain unwanted moisture.
Step 7: Regular Maintenance
The final step in the waterproofing process is to establish a routine for regular maintenance. Vigilance is key to early detection of potential problems, and immediate action can prevent minor issues from escalating into major repairs.
Routine Inspections
Set a schedule for inspecting your egress window wells. It’s a good practice to check them at least once each season, as well as after significant weather events like heavy rainstorms or rapid snowmelt. Look for any signs of leakage (i.e. water stains or dampness), which could indicate that water is seeping through. Also, inspect for any structural damage to the window well itself, such as rust on metal wells or cracks in plastic wells.
Drainage System Check
Ensure that the drainage system in your egress window well is functioning correctly. Pour water into the well to test how quickly it drains away; if you notice slow drainage or pooling water, it’s time to investigate. Remove any visible obstructions, and if the problem persists, you may need to consult a professional to inspect or possibly repair the drainage system.
Sealant and Membrane Upkeep
Check the condition of the sealants and waterproof membrane you’ve applied. Over time, these materials may deteriorate due to weather exposure or natural wear and tear. Look for any cracks, peeling, or areas that might have come loose. Address these issues by reapplying sealant or repairing the membrane as needed.
By following these steps, you can significantly reduce the risk of water damage to your egress window wells. However, if you’ve tried these measures and still experience issues, it may be time to consider a full replacement.
Secure Your Window Well with Egress Solutions!
As one of the most prominent egress window distributors and suppliers in the Mid-Atlantic region, we offer a wide range of high-quality egress window solutions that are designed to keep your basement dry — and your home safe. Contact us today to find the perfect fit!
